
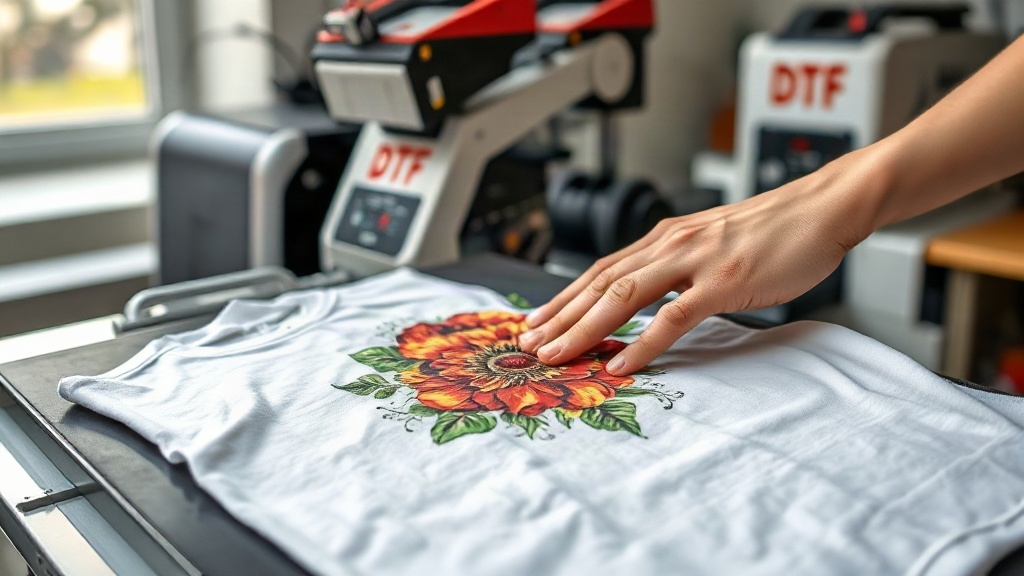
If you've been in the custom apparel game for any length of time, you've likely heard the buzz around DTF transfers. Maybe you're a small business owner looking to offer personalized shirts, a hobbyist wanting to create one-of-a-kind gifts, or a designer exploring new printing techniques. Whatever your background, understanding DTF transfers can open up a world of possibilities for your projects. In this guide, I'll walk you through everything you need to know about DTF transfers, from what they are to how to apply them like a pro, and why they might just become your new favorite decoration method.
What Are DTF Transfers?
DTF stands for Direct to Film. It's a printing technology where your design is printed onto a special film, coated with a adhesive powder, and then heat-pressed onto your fabric. Unlike DTG (Direct to Garment) or screen printing, DTF transfers are created separately from the garment, giving you more flexibility and consistency. The process involves a DTF printer, which uses specialized inks and films to produce a transfer that can be applied to a wide range of materials, including cotton, polyester, blends, and even some non-fabric items like leather or canvas.
The DTF Printing Process Explained
To create a DTF transfer, you start with a digital design. The printer lays down a layer of white ink (if needed) followed by CMYK colors onto a PET film. This film is then dusted with a hot-melt adhesive powder, which is cured to create a dry, tacky surface. The result is a transfer that can be stored and used later. When you're ready, you simply place the transfer on your garment and apply heat and pressure. The adhesive melts, bonding the ink to the fabric. The film is then peeled away, leaving a vibrant, durable print.
Why Choose DTF Transfers Over Other Methods?
There are several reasons why DTF transfers have gained popularity among crafters and professionals alike. Here are the key benefits:
- Versatility: DTF transfers work on almost any fabric, including cotton, polyester, nylon, and blends. They're also great for hard-to-print items like caps, bags, and shoes.
- No Weeding Required: Unlike vinyl, DTF transfers don't require weeding, saving you hours of tedious work. This makes them ideal for intricate designs with fine details.
- Vibrant Colors: DTF prints produce bright, opaque colors that pop, even on dark garments. The white ink base ensures that your design stands out.
- Durability: When applied correctly, DTF transfers are highly durable and can withstand repeated washing without cracking or fading.
- Cost-Effective for Small Runs: Unlike screen printing, which requires setup costs per color, DTF transfers are cost-effective for small batches and one-offs.
How to Apply DTF Transfers: Step-by-Step
Applying DTF transfers is straightforward, but following the right steps ensures a professional finish. Here's a detailed guide:
- Preheat Your Heat Press: Set your heat press to 325°F (160°C) and preheat the garment for 5-10 seconds to remove moisture and wrinkles.
- Position the Transfer: Place the DTF transfer on the garment with the printed side facing up. If your transfer has a white backing, that's the side that goes against the fabric.
- Press: Apply medium to firm pressure for 10-15 seconds. Use a heat press rather than an iron for best results, as consistent pressure and temperature are crucial.
- Peel: After pressing, wait a few seconds for the transfer to cool slightly, then peel the film off in a smooth, consistent motion. You can do either a hot peel or cold peel depending on the film type; check your supplier's instructions.
- Post-Press (Optional): For extra durability, cover the design with a Teflon sheet or parchment paper and press again for 5-10 seconds.
Common Mistakes to Avoid
Even with the best intentions, beginners often run into issues. Here are some pitfalls to watch out for:
- Insufficient Pressure: If the transfer doesn't adhere properly, it may peel off after washing. Make sure your press applies even pressure across the entire design.
- Wrong Temperature: Too hot and you'll scorch the fabric; too cold and the adhesive won't activate. Always follow the recommended settings.
- Peeling Too Soon or Too Late: Peeling at the wrong time can cause the design to crack or leave residue. Practice on scrap fabric to get the timing right.
- Ignoring Fabric Type: Some fabrics, like those with a heavy weave or coating, may require different settings. Always test first.
Designing for DTF Transfers: Tips for Best Results
Creating a design that looks great on screen and on fabric requires a bit of know-how. Here are some design considerations:
- Resolution: Use high-resolution images (300 DPI or higher) to ensure crisp lines and vibrant colors.
- Color Mode: Design in CMYK rather than RGB, as DTF printers use CMYK inks. This helps avoid color surprises.
- Background: DTF transfers can handle both light and dark garments, but if you want the fabric color to show through, you'll need to leave those areas transparent in your design.
- Size: Consider the size of the transfer relative to the garment. Oversized prints can be striking, but make sure they fit within the pressable area.
- Fine Details: DTF is excellent for fine details, but extremely thin lines (less than 0.5pt) may not reproduce well. Test small elements.
DTF vs. Other Printing Methods
How does DTF stack up against other popular decoration methods? Here's a quick comparison:
- DTF vs. DTG: DTG prints directly onto the garment, which can be limiting for dark colors and blends. DTF offers more versatility and often better durability.
- DTF vs. Screen Printing: Screen printing is cost-effective for large orders but requires setup per color. DTF is better for small runs and complex designs.
- DTF vs. Vinyl: Vinyl requires weeding and layering, which is time-consuming. DTF is a single-step process with no weeding, and it can handle full-color designs easily.
- DTF vs. Sublimation: Sublimation only works on polyester and light-colored fabrics. DTF works on almost any fabric and any color.
Frequently Asked Questions About DTF Transfers
How long do DTF transfers last?
With proper application and care, DTF transfers can last as long as the garment itself. They are resistant to cracking, peeling, and fading. To maximize longevity, wash the garment inside out in cold water and avoid using bleach or fabric softeners. Tumble dry on low or hang dry.
Can I use DTF transfers on 100% polyester?
Yes, DTF transfers work well on polyester, including 100% polyester. However, because polyester is heat-sensitive, you may need to lower the temperature slightly (around 300°F) and use a shorter press time to avoid scorching. Always test on a scrap piece first.
Do I need a special printer for DTF transfers?
Yes, DTF printing requires a dedicated DTF printer that uses DTF inks and films. You can also purchase pre-printed DTF transfers from suppliers if you don't want to invest in a printer. Many small businesses start by outsourcing transfers and later bring printing in-house.
What is the best way to store DTF transfers?
Store unused DTF transfers in a cool, dry place, away from direct sunlight. Keep them in a sealed bag or container to prevent dust and moisture from affecting the adhesive. Properly stored transfers can last for several months.
Can I layer DTF transfers?
Yes, you can layer DTF transfers to create multi-color or multi-layer designs. However, it's best to press each layer separately, allowing each to cool before adding the next. This ensures proper adhesion and prevents bleeding.
DTF transfers have truly transformed the custom apparel industry, offering unparalleled versatility, vibrant results, and ease of use. Whether you're a seasoned pro or just starting out, incorporating DTF into your workflow can elevate your creations. Remember, practice makes perfect, so don't be afraid to experiment. With the right techniques and a bit of patience, you'll be producing stunning, durable prints that your customers will love.