
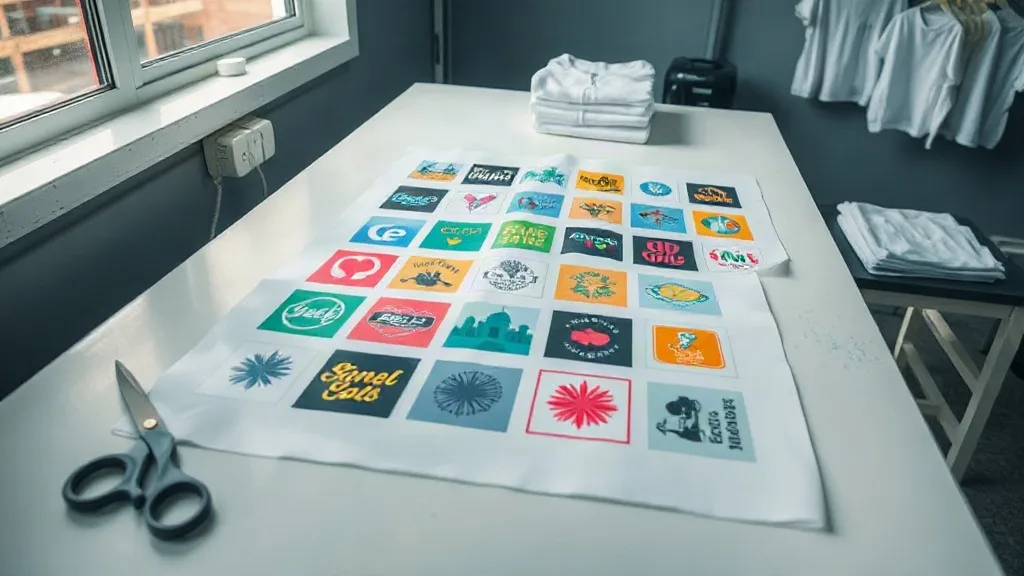
Most DTF problems start before the transfer ever reaches the heat press. A design gets nested too close to the edge of a DTF Gangsheet, the cut lines blur together, and suddenly a simple job turns into a reprint. If you run a small shop, you already know that a gangsheet is not just a bigger sheet of film. It is a production plan, and the way you lay it out decides how smoothly the rest of the day goes.
This guide is written from the press side of the shop. It covers how to plan a gangsheet around the jobs you actually have, how to nest designs so the cutter and the press both behave, and how to order in a way that keeps your film usable instead of wasted.
What a DTF Gangsheet Is Doing for Your Shop
A DTF Gangsheet is a single sheet of transfer film that holds multiple designs. Instead of ordering one small transfer per shirt, you arrange many designs on one sheet, which cuts down on film waste, shipping cost, and the number of times you load the printer. For shops that print a lot of small logos, names, or patch-sized art, the savings add up quickly.
The catch is that a gangsheet rewards planning. A sheet packed with random art at random sizes will print fine but press badly. A sheet planned around garment sizes, fabric types, and press order will move through the shop with far fewer surprises.
Plan Around the Job, Not the Sheet
The most common mistake is opening the layout software and starting to drag designs onto a canvas. That approach usually ends with a sheet that is technically full but practically awkward. Start with the job list instead.
Group by garment and fabric
Press settings differ between cotton tees, polyester blends, canvas, and nylon. If a gangsheet mixes designs for very different fabrics, the press operator has to reset temperature, pressure, and dwell time for each group. That is fine for a small mixed order, but for a bulk run it slows everything down.
Try to group designs by the fabric they will land on. A sheet of cotton tee art can run at one setting. A sheet of polyester performance wear can run at a lower temperature. Keeping those groups on separate sheets means fewer press changes and less risk of scorching.
Match design size to placement
A left-chest logo and a full-back print should not share the same nest if you can avoid it. Left-chest designs are small and can be packed tightly. Full-back designs need more space and often need to be cut as a single piece. Mixing them on one sheet usually means one of the two gets shortchanged on spacing.
Leave room for the cutter
If you cut by hand, you need a clear path between designs. If you use a vinyl cutter or plotter, you need registration marks and enough margin for the blade to travel. A sheet that looks efficient on screen can be a nightmare to cut if designs are crowded right up against each other.
Nesting Rules That Save Film and Headaches
Nesting is the art of fitting designs into the smallest space without making them hard to handle. The goal is not maximum density. The goal is density that still allows clean cutting and clean pressing.
- Keep a consistent gap between designs. A gap of about 0.125 to 0.25 inches works for most shops, but check what your cutter can reliably handle.
- Rotate designs only when it helps the nest. Rotating a design with text can make it harder to inspect and weed later.
- Place larger designs first, then fill gaps with small ones. This avoids awkward leftover strips.
- Keep similar colors together when possible. It makes color inspection faster and helps spot print defects early.
- Avoid placing a design right on the sheet edge. Leave a margin so the film feeds and cuts cleanly.
One habit that pays off: print a small test sheet with your most common nest pattern before committing to a full production run. It takes a few minutes and catches spacing issues before they cost you film.
Ordering a DTF Gangsheet Without Wasting Film
Ordering is where a lot of shops lose money quietly. They order a sheet that is slightly too large, or they order too few designs to fill it, or they order a sheet that arrives rolled and creased. A few simple checks prevent most of that.
Check the sheet size against your printer
Gangsheet sizes vary by supplier. Before you order, confirm the maximum width and length your printer and cutter can handle. A sheet that is a half inch too wide will not feed, and a sheet that is too long may hang and wrinkle.
Confirm the film type and adhesive
Not all DTF film behaves the same. Some films are designed for hot peel, some for cold peel. Some adhesives work better on cotton, others on polyester. If your supplier offers options, match the film to the fabric you print most.
Ask about powder and cure consistency
The adhesive powder and cure step are where quality is won or lost. A supplier that rushes the powder application will send you sheets with patchy adhesive, which shows up as transfers that peel at the corners. Ask how the powder is applied and whether the sheets are cured evenly.
Order in quantities that match your run
Gangsheets are usually priced better in bulk, but only if you will use them. Film has a shelf life, and stored sheets can pick up moisture or dust. Order what you can press within a reasonable window, and store the rest flat and dry.
Press-Side Handling That Protects the Sheet
Once the sheet is in the shop, treat it like a production asset. Keep it flat, keep it dry, and keep it clean. Dust and lint are the enemy of a clean press, and a sheet that has been sitting open on a bench will pick up both.
Before pressing, inspect the sheet under good light. Look for missing powder, smudged ink, or designs that printed too close to the edge. Catching those issues before the press saves a shirt. It also tells you whether the problem is in the file, the printer, or the supplier.
When you cut, cut with the design in mind. Leave a small border around each piece so the transfer can be positioned without the cut edge showing on the garment. For small logos, a border of a few millimeters is enough. For larger prints, a slightly wider border helps with alignment.
Common Gangsheet Mistakes and How to Avoid Them
Most gangsheet failures fall into a few patterns. Here is what to watch for.
- Overpacking the sheet. It looks efficient but makes cutting and pressing slow. Leave breathing room.
- Mixing fabric types on one sheet. It forces press changes and increases the chance of a scorch or undercure.
- Ignoring grain direction. Some fabrics show a difference when a print is rotated. Check before you nest.
- Ordering without a test print. A small test catches spacing and color issues before a full run.
- Storing sheets upright. Film can crease or curl. Store flat.
Frequently Asked Questions
How full should a DTF Gangsheet be?
Aim for a sheet that is full enough to be cost-effective but not so packed that cutting becomes difficult. Leaving a small margin around designs and a consistent gap between them is more important than squeezing in one more logo.
Can I mix different fabric types on one gangsheet?
You can, but it is usually not worth it for bulk work. Different fabrics need different press settings, so mixing them means more press changes and a higher chance of a mistake. Group by fabric when you can.
What is the best way to store unused gangsheets?
Keep them flat, dry, and out of direct sunlight. A clean drawer or a flat shelf works well. Avoid rolling them tightly, since creases can show up in the press.
How do I know if a gangsheet is printed well?
Inspect the sheet under bright light before pressing. Look for even powder coverage, sharp edges, and no smudging. A quick test press on a scrap garment confirms the transfer behaves as expected.
Should I order gangsheets in bulk to save money?
Bulk pricing can help, but only if you will use the sheets within their shelf life. Order what matches your production schedule, and store the rest properly so the film stays clean and flat.