
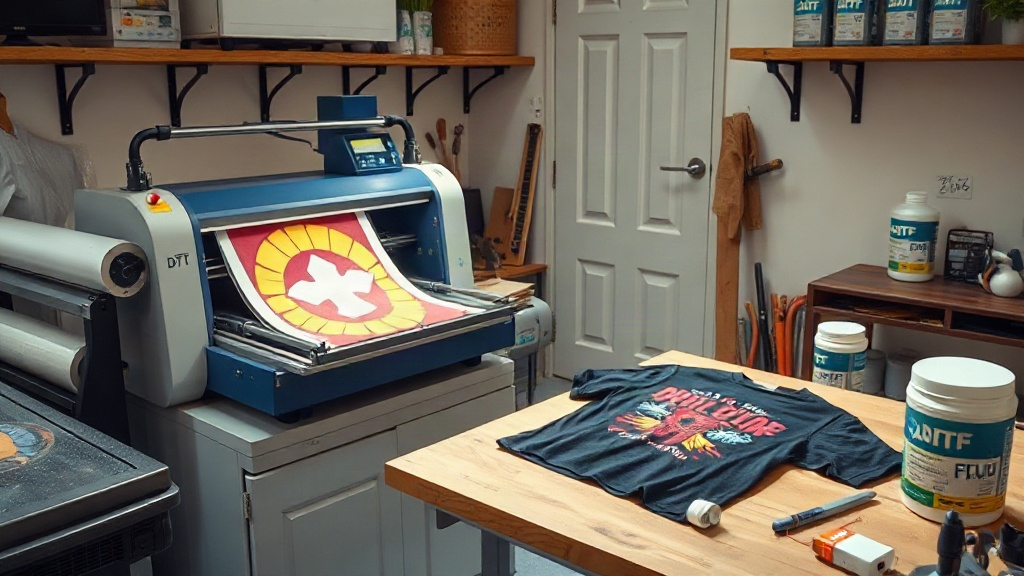
If you've been exploring custom apparel printing, you've likely encountered DTF printing. Short for Direct-to-Film, this method has quickly become a favorite among small business owners, crafters, and print enthusiasts. Unlike traditional techniques that require specific fabrics or extensive setup, DTF printing offers remarkable flexibility and vibrant results. In this guide, we'll walk you through everything you need to know to get started with DTF printing, from the basic process to practical tips for success.
What is DTF Printing?
DTF printing is a digital printing technology where your design is printed onto a special film, coated with a powder adhesive, and then heat-pressed onto the fabric. The magic lies in its simplicity: you can print on almost any fabric, including cotton, polyester, blends, and even leather. The process uses water-based inks and a thermoplastic polyurethane (TPU) powder that acts as the glue between the ink and the fabric. Once pressed, the result is a durable, stretchable, and vivid print that feels soft to the touch.
How Does DTF Printing Work?
Understanding the step-by-step process helps you appreciate why DTF printing is so effective. Here's a breakdown of the key stages:
- Design Preparation: Create or source your artwork. Ensure it's high resolution and mirrored (unless your printer software handles it automatically).
- Printing: Using a DTF printer, the design is printed onto a PET film. White ink is often used as a base layer to make colors pop on dark fabrics.
- Powder Application: While the ink is still wet, TPU powder is sprinkled over the film. The excess powder is shaken off, leaving a thin, even layer adhering to the ink.
- Curing: The film goes through a curing oven or heat press to melt the powder, creating a flexible, adhesive layer.
- Transfer: The film is placed on the fabric and heat-pressed. After cooling, the film is peeled away, leaving the design bonded to the fabric.
Why Choose DTF Printing?
There are several compelling reasons why DTF printing stands out:
- Fabric Versatility: Works on cotton, polyester, nylon, leather, and more. No need for pre-treatment.
- No Weeding: Unlike vinyl, there's no tedious cutting and weeding.
- Vibrant Colors: White ink base allows bright, opaque prints on dark garments.
- Durability: Prints resist cracking, peeling, and fading after multiple washes.
- Cost-Effective for Short Runs: Ideal for small batches and custom orders without minimums.
- Soft Feel: The print is lightweight and stretchable, moving with the fabric.
DTF vs. Other Printing Methods
How does DTF stack up against DTG, screen printing, and vinyl? Let's compare:
DTF vs. DTG
DTG (Direct-to-Garment) prints directly onto fabric, primarily cotton. It requires pre-treatment and can struggle with polyester. DTF works on almost any fabric and often produces more vibrant colors on dark materials. However, DTG may offer a slightly softer feel for light-colored cotton shirts.
DTF vs. Screen Printing
Screen printing is cost-effective for large orders but requires setup per color and is impractical for complex designs with many colors. DTF excels at detailed, multi-color designs and short runs, with no setup fees.
DTF vs. Vinyl
Heat transfer vinyl (HTV) requires weeding and layering, which is time-consuming. DTF transfers are printed and ready to press, making them faster for intricate designs.
Getting Started with DTF Printing
Ready to dive in? Here's what you need:
Essential Equipment
- DTF Printer: Options range from converted Epson printers to dedicated DTF machines. Brands like Roland and Mutoh offer reliable models.
- DTF Film: Available in rolls or sheets. Choose quality film for consistent results.
- TPU Powder: Fine or medium grade, depending on your preference.
- Curing Oven or Heat Press: For melting the powder and transferring the design.
- Heat Press: A reliable press with accurate temperature and pressure control.
- Design Software: Adobe Photoshop, Illustrator, or free alternatives like GIMP or Inkscape.
Step-by-Step Tutorial
Follow along to create your first DTF transfer:
- Create Your Design: Use software to prepare your artwork. Remember to mirror the image if your printer doesn't auto-mirror.
- Print on Film: Load the DTF film into your printer and print. Ensure the printer is set for DTF ink (CMYK + White).
- Apply Powder: While ink is wet, sprinkle TPU powder evenly. Shake off excess.
- Cure the Powder: Place film in a curing oven at around 320°F (160°C) for 2-3 minutes, or until powder melts and becomes glossy.
- Preheat Your Heat Press: Set temperature to 330°F (165°C) and pressure to medium-high.
- Press the Transfer: Place the film on the fabric, cover with a Teflon sheet, and press for 15-20 seconds.
- Peel and Enjoy: Wait for it to cool (or peel hot, depending on film instructions), then peel off the film. Your design is now on the fabric!
Tips for Success
- Test Your Settings: Every printer and film combo behaves differently. Do test prints to dial in temperature, pressure, and time.
- Use Quality Materials: Cheap film or powder can lead to dull prints or poor adhesion.
- Store Film Properly: Keep film in a cool, dry place to prevent curling or moisture absorption.
- Maintain Your Printer: Regular cleaning prevents clogs and ensures consistent output.
- Experiment with Fabrics: Try different materials to see what works best for your niche.
Common Challenges and Solutions
Even with the best setup, you might encounter issues. Here's how to troubleshoot:
Faded or Dull Prints
Increase white ink density or check if your powder is fully cured. Also, ensure your fabric is clean and lint-free.
Poor Adhesion
Adjust heat press settings: higher temperature or pressure may be needed. Also, verify that the powder is properly melted.
Cracking or Peeling
This often results from under-curing or stretching the print too much. Ensure proper curing and gentle washing.
Applications of DTF Printing
DTF printing opens up a world of possibilities:
- Custom T-shirts: Perfect for small businesses, events, and gifts.
- Sportswear: Stretchy prints that move with the body.
- Denim and Jackets: Add designs to jeans, jackets, and more.
- Bags and Accessories: Personalize tote bags, backpacks, and hats.
- Home Decor: Create custom pillows, aprons, and more.
Frequently Asked Questions
What fabrics can I use with DTF printing?
DTF printing works on a wide range of fabrics, including cotton, polyester, blends, nylon, leather, and even some treated materials. It's one of the most versatile printing methods available.
Do I need special ink for DTF printing?
Yes, DTF printing requires DTF-specific inks, typically CMYK plus white. These inks are formulated to work with the TPU powder and provide vibrant, durable results.
How long does a DTF print last?
With proper application and care, a DTF print can last as long as the garment itself. It resists cracking, peeling, and fading through many washes when washed inside out in cold water and air-dried.
Can I use a regular inkjet printer for DTF?
No, standard inkjet printers aren't suitable. You need a printer converted for DTF use, which includes a white ink channel and a film feeding system. Dedicated DTF printers are recommended for best results.
Is DTF printing cost-effective for small businesses?
Absolutely. DTF printing has low startup costs compared to screen printing and no minimum order requirements. It's ideal for small batches, custom orders, and print-on-demand.
With its versatility and ease of use, DTF printing is a game-changer for anyone in the custom apparel industry. Whether you're a hobbyist or a growing business, mastering DTF printing can open up new opportunities. So gather your supplies, fire up your printer, and start creating stunning, long-lasting designs today.