
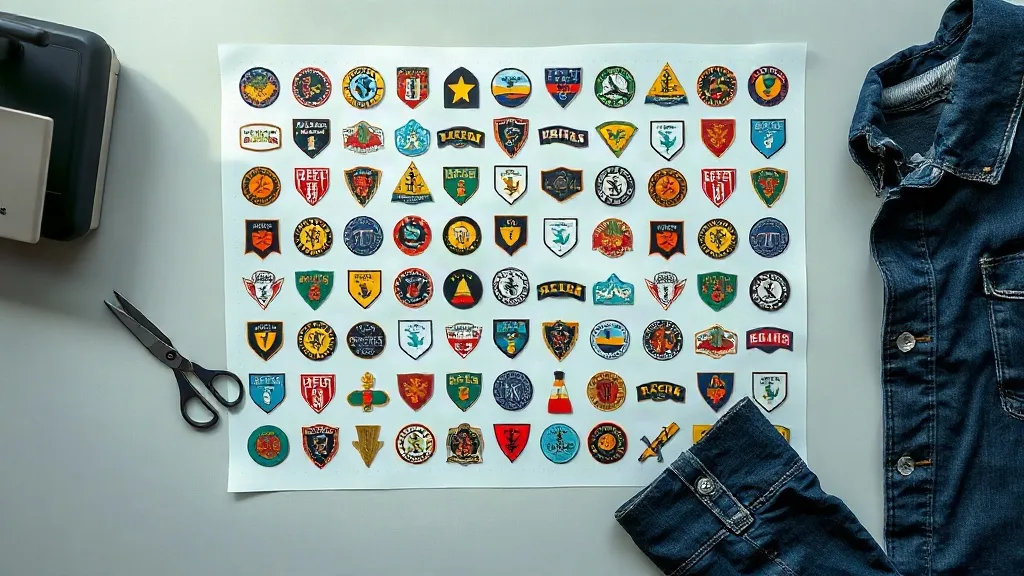
If you have ever ordered custom patches in small batches, you know the quiet frustration of setup fees and minimum quantities. You want twenty designs for a club, a team, or a weekend market table, and the printer quotes you a price built for someone ordering two thousand. A DTF Gangsheet is the workaround that changed how small shops and independent designers approach this problem. Instead of paying per design, you fill a single sheet of transfer film with as many artworks as will fit, and the whole thing prints in one run. The concept is simple, but using it well takes a bit of planning, and that planning is where most people either save money or quietly waste it.
What a DTF Gangsheet Actually Is
Direct-to-film printing works by jetting water-based pigment inks onto a special PET film, then dusting the wet ink with a hot-melt adhesive powder. The powder fuses to the ink, the excess shakes off, and the result is a transfer you can press onto fabric with a heat press. A gangsheet is simply that same film, laid out to hold many separate images rather than one large print.
The key detail is that each artwork on the sheet stays independent. You cut around each design, press it wherever you need it, and the adhesive backing does the rest. For patch makers, this matters because you are not locked into one shape or one fabric. You can print a crest for a denim jacket, a small logo for a cap, and a set of name tags on the same sheet, then apply them to entirely different garments.
Why It Suits Custom Patches So Well
Traditional embroidered patches require digitizing, thread changes, and a minimum stitch count that punishes small orders. Woven patches need a loom setup. Both are excellent for large runs, but both make a five-piece order expensive. DTF printing skips the setup step entirely. Once your file is ready, adding a second or third design to the sheet costs almost nothing beyond the film area it occupies.
The other advantage is detail. Fine text, gradients, photographic elements, and thin outlines all reproduce cleanly because there are no threads to blur the edges. If your patch design includes a small motto in a condensed font, DTF will hold it far better than embroidery at the same size.
Planning Your Layout Before You Order
The most common mistake is treating the sheet like a blank canvas and dropping designs in wherever they look nice. Film is a fixed rectangle, and empty space is money you have already spent. A few minutes of layout work pays for itself immediately.
Nest Shapes Instead of Stacking Them
Circular and oval patches leave curved gaps. Slide smaller designs into those gaps rather than lining everything up in tidy rows. A set of round crests can often cradle small rectangular tags in the corners between them. Rotating an awkward shape by a few degrees frequently frees enough room for one more item.
Leave a Cutting Margin
Every artwork needs a small buffer of clear film around it so you can trim cleanly with scissors or a cutter. Crowding designs edge to edge saves space on paper but makes trimming slow and error-prone, and a slipped cut can nick the neighboring transfer. A few millimeters of breathing room is worth the tiny loss of area.
Group by Fabric and Color
If you are pressing onto both light cotton and dark polyester, keep those groups visually separated on the sheet. It speeds up trimming and reduces the chance of pressing the wrong transfer onto the wrong garment. The same applies to designs that share a color palette, since you can spot a misprint faster when similar pieces sit together.
Getting the Press Settings Right
A transfer is only as good as the press that applies it. Temperature, pressure, and time all interact, and the right combination depends on the fabric underneath. As a starting reference, most DTF transfers press in the range of 150 to 160 degrees Celsius for around 10 to 15 seconds with medium to firm pressure, but treat that as a starting point rather than a rule.
- Cotton and cotton blends: generally the most forgiving. Press, peel cool or hot depending on the film, then do a short second press with a cover sheet to lock the edges.
- Polyester: lower the temperature slightly to reduce dye migration, where the garment's own color bleeds up into the transfer.
- Nylon and coated fabrics: test a scrap piece first. Some coatings repel the adhesive and need a longer dwell time.
- Stretch fabrics: a slightly longer, cooler press keeps the adhesive flexible so the transfer moves with the garment instead of cracking.
Always peel according to the film type. Cold peel films need the sheet to cool completely before you lift it; hot peel films want to come off while still warm. Peeling at the wrong moment is the single most common cause of a transfer that looks fine on the press and fails a week later.
Cost, Waste, and the Small-Run Math
Gangsheets are priced by area, not by design count, so the economics reward density. If you fill a sheet efficiently, your cost per patch can drop to a fraction of what a small embroidered order would cost. If you leave half the film empty, you have paid for air.
A practical habit is to keep a running list of pending designs. When a client asks for a single patch, add it to the list instead of ordering immediately. Once you have enough to fill most of a sheet, place the order. This turns a series of expensive one-offs into one economical run, and it keeps your turnaround predictable because you always know roughly how much space the next order will need.
Waste also comes from misprints, and most misprints trace back to the source file. Raster images at low resolution, text converted to outlines that lost a thin stroke, or colors that shift because the file was saved in the wrong color space all cause reprints. Supply clean, high-resolution artwork with transparent backgrounds and confirm the color mode before the file goes to print.
Durability and Care for Finished Patches
A well-pressed DTF transfer survives dozens of wash cycles. The failure modes are predictable: edges lift when the initial press was too light, cracking appears when the film was stretched during application, and fading happens when the garment was washed in hot water repeatedly.
Wash inside out on a cool cycle and skip the high heat of a tumble dryer where possible. If you must tumble dry, use a low setting. Never iron directly over the transfer, because the heat will re-melt the adhesive and pull the design into the iron plate. Press from the reverse side or use a cover cloth.
When a Gangsheet Beats Other Patch Methods
Embroidery still wins for heavyweight workwear crests and anything that needs a raised, textured look. Woven patches remain the classic choice for scout-style badges with tight, uniform detail. But for short runs, mixed designs, full-color artwork, and fast turnaround, DTF is hard to beat. It is particularly strong for sample sets, promotional batches, and one-off pieces where the customer wants to see the design on a real garment before committing to a larger order.
If you are ordering patches for a project and want to keep costs sane without sacrificing detail, building a dense, well-planned sheet is the move. Plan the layout, press carefully, and the results will hold up as well as anything sewn on.
Frequently Asked Questions
How many patches fit on a single DTF gangsheet?
It depends entirely on the size of your designs and how tightly you can nest them. A sheet filled with small 5 cm tags might hold well over a hundred pieces, while large 20 cm back patches might allow only a handful. The practical answer is to lay out your artwork at true scale in a design program and count what fits before you order.
Can I mix different patch designs on the same sheet?
Yes, that is the whole point. Each artwork prints as an independent transfer, so you can combine logos, crests, name tags, and one-off graphics on one film. Just leave a small clear margin around each design so trimming stays clean and neighboring transfers are not damaged.
Do DTF patches work on dark and colored fabrics?
They do, and this is one of their strengths. The white ink layer sits beneath the color, so designs stay vivid on black, navy, or any dark garment. On heavily dyed polyester, lower the press temperature slightly to reduce the risk of the garment's dye migrating into the transfer.
How long do DTF patch transfers last after washing?
With a correct press and reasonable care, expect the transfer to outlast the garment in most cases. Wash inside out on a cool cycle, avoid harsh bleach, and keep direct iron heat off the design. Most failures come from an under-pressed edge rather than the film itself.
What file format should I send for printing?
Vector files such as SVG, EPS, or PDF with outlined text give the crispest results, especially for small lettering. High-resolution PNG files with transparent backgrounds also work well. Keep the resolution high enough that fine details do not blur, and confirm the color mode matches what the printer expects.